Pachyderm is an incredibly powerful data science and data processing platform. But, as with any powerful tooling, there are some gotchas along the way. In this Medium post, we share 5 common “gotchas” that we’ve experienced from unique image tags to glob pattern diagnostics and how to handle them. These tips can be useful for anyone getting started with Pachyderm or even those who have been using it for years.
I’ve been building machine learning and data processing pipelines with Pachyderm for a while now. It’s an incredibly powerful platform, but as with most things, there are some “gotchas” along the way. I sadly learned all of these lessons the hard way, but hopefully I can help others avoid the pain through some of these tips and work-arounds.

For those that don’t know, Pachyderm is a data science and data processing platform. It focuses on data as the means of communication between processing pipelines — for example, if your training data changes, Pachyderm automatically tells your ML pipeline to re-run and update the model with the new data. Pachyderm runs on Kubernetes, which means it can scale pretty much indefinitely if you’re running on a cloud platform (without being tied to a specific one), and it is really flexible — having Docker as the mechanism for scaling means you aren’t tied to a specific language or library to take advantage of this scalability.
Scaling Your Pipelines with Pachyderm: 5 Tips
1. Always have a unique image tag
One of the common ways to iterate on a Docker image is to continuously update the latest tag for the image. This works reasonably well most of the time, because even when you don’t specify a specific version, most systems will assume you meant the latest one.
However, when working with Kubernetes (and therefore Pachyderm as well), specifying the latest tag has some unintended consequences related to pull policies. Basically, Kubernetes tries to be smart with how it pulls images. Downloading them every time can be redundant, so it checks the version to see if it is out of sync with the Docker registry. But if it doesn’t have a unique tag to compare, then it may not pull your most recent container!
More information on the Kubernetes reasons for this can be found here.
Many times I’ve found myself neck deep in code that I know should work, but it isn’t behaving as expected. After I’ve lost my mind for the better part of an hour, I check the image hash running on the cluster, compare it with the one I built locally and realize my error — I’ve been changing code that wasn’t even running.
There are a few techniques to handle the development workflow. If you are iterating on the Docker image a lot, then the build flag is a good thing to consider. It will automatically use the image hash as the tag, making sure that it is always unique and that the pipeline is always updated properly. These types of tools always come with some caveats, so it’s worth understanding which steps they’re automating before adopting them.
2. Know what your inputs look like
It’s embarrassing the number of times my pipeline is erring because I messed up when writing the glob pattern. Two tips to help this are:
For many pipeline operations, you can test your glob pattern to see what it will return using the pachctl glob command. E.g. the code below shows the /* glob is returning 4 datums (a directory) that will be processed.
$ pachctl glob file sample_data@master:/*
NAME TYPE SIZE
/0 dir 44.62MiB
/1 dir 17.38MiB
/2 dir 19.18MiB
/3 dir 36MiB
This is useful if you are focusing on a single input repo, but what about a more difficult situation such as using:cross, join or union to combine datums in a complex way?
Debugging the inputs in these cases can be difficult, so I created a pipeline that runs the tree command to print out the inputs the jobs in a pipeline, which can be useful in debugging this stage. I substitute my experimental pipeline’s input into this pipeline, when I need to understand how the data is getting mapped in.
Pachyderm pipeline to inspect how the inputs are mapped into the container when it executes.
Run the pipeline with the command below, ensuring that you use the --reprocess flag is used so that “successful” datums are not skipped.
pachctl update pipeline -f pachyderm-inspect-input.json --reprocess3. Monitor Your Pipelines
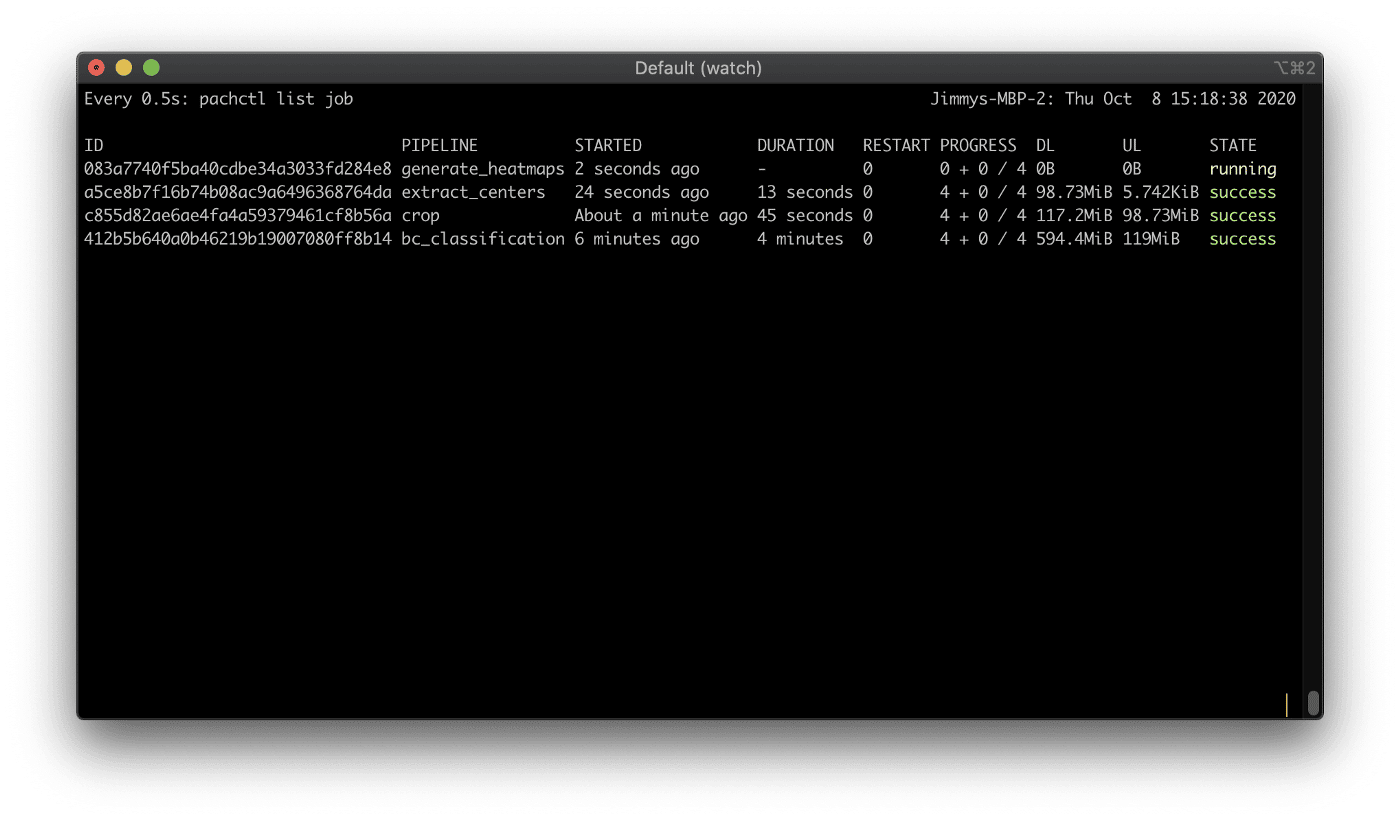
There are a couple of things that need to happen when you create/update your pipelines. Pachyderm needs to pull the container, allocate the resources, determine the jobs that will run, create the pod, etc. I usually pop this command in a window, to monitor the status of my pipeline, so I’m not spamming the logs or pipeline/job status.
watch -n0.2 --color "pachctl list job”

Monitoring Pachyderm pipelines using the “watch” command. (Image by author)
4. Defining resources can get weird
Defining resource requests can get weird, especially with GPUs. All of these things can be affected by your Kubernetes configuration, which Pachyderm will inherit, but here’s a couple of things that I’ve learned.
- For CPUs, in many deployments, the initial node has no GPU but it has ~15GB of memory, so memory and CPUs area already available from this first node that can handle most workloads.
- For GPUs, the auto-provisioner is stingy. It makes the smallest possible node by default, and depending on the job, it can throw an OOM error when running the workload. On GCP for example, the auto-provisioner typically uses the standard
n1instance type, so the smallest node is 1 CPU and 0.95GB of memory (although you can get into a situation where the request is 0 CPUs and 64M of memory). For many deep learning tasks, you will need more than this just to get things loaded into VRAM of the GPU.
Setting the requirements is pretty easy in the pipeline spec, and it goes a long way ensuring that pipelines aren’t crashing due to resource allocation errors.
If you need to specify the type of GPU, then you can do that by setting it in the scheduling_spec according to what your cloud provider calls it.
Standby is another feature that is pretty beneficial here. If we set standby to true, then it will free the resources that are defined in the pipeline whenever there isn’t a job to be run. This has its benefits in some cases, freeing the resources for other pipelines to use, but if your resources take some time to allocate (GCP can take up to 10 min to allocate a GPU resource), then you can get caught spending the majority of your time waiting for a resource to come up.
5. Understand the Basics
“Any fool can know. The point is to understand.”
This should arguably be the first point in this post. I saved it for the end because it seems so obvious that everyone would skip right past the whole post if it were mentioned first. But I guarantee if you spend 5–10 minutes actually trying to understand:
If you do, everything pretty much falls into place. You understand what Pachyderm is able to do, where things can go wrong, and even how to debug, because you know the names of the abstractions and can Google them. Moreover, you find yourself thinking about machine learning differently — “How should I be versioning my data? What impacts does a changing model have on my pipeline? When should I re-train my model with new data?” Before I understood the basics of Pachyderm, I thought of these questions as “things we’ll get to later,” but like applying Git to code, the sooner you employ good practices, the better your life is going to be later on.
There’s always a balance with this one. “You don’t know what you need to know until you need it.” But even a rough, general understanding can save you a lot of time in the long run.
Conclusion
Pachyderm is a really powerful machine learning platform that gives you a “living system” for your data pipelines, rather than an experiment-oriented job execution. But with any new way of thinking, there’s guaranteed to be some spin-up required. Hopefully, these tips save you some headaches while building some really cool pipelines.
If you’re interested in more information on using Pachyderm, check out the Boston Housing Prices Example or the Getting Started section of the Docs.
View the full medium post here.


